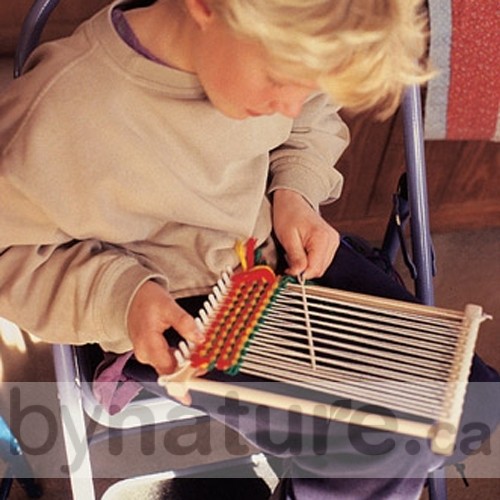
Kids love making things, exploring and transforming stuff with their hands. I like giving my children crafts with growth potential, so there is another step to take if they want it. Start with a small woven mat, and your child may want to keep weaving until you have a blanket, a wall hanging, and a whole set of mats.
Weaving, moving one thread up and down through another thread, can help a child learn basic mathematical skills, fine motor control, dexterity, and concentration. And, creating a beautiful product from quality materials builds self-confidence and gives your child a sense of accomplishment.
It’s lambing season. We’re celebrating by focusing on the wool that lambs and sheep give us. We often talk about wool as a useful fiber for cloth diapering, but we love wool for many other household uses. Wool feels good in the hands. As children develop their skills, we like knowing that they are doing so using natural fibers. If you would like to go back and try other crafts with your children, we’ve shared ideas for felting wool balls and spool knitting over the past couple of weeks.
Start with a Loom
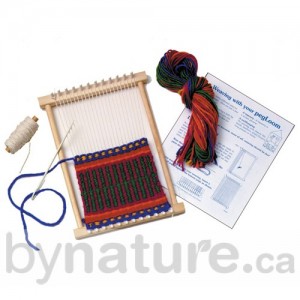
You can build a simple tapestry loom with a frame and pegs at the top and bottom. You can make it any size and shape your materials allow. That might be a future project, though. For those just starting out, we sell a basic 12-peg wooden loom that both children and adults will enjoy using.
Need
- Loom
- Wool yarn
- String for warp
- Needle or shuttle

How Weaving Works
Basic weaving has warp and weft. You use string up and down between the top and bottom pegs of the loom to create the warp. This provides the basic structure of your woven piece. You can weave so the warp is covered or so that it shows. The main yarn that gives your weaving color and weight is the weft. Weft means woven (weaved > wef-ed > weft). This is the thread or yarn that is woven through the strings of the warp.
The simplest way to start weaving is to use a needle. Using a fine point helps your child navigate up over one string and down under the next while the fine needle is small enough that they can easily see their progress as they weave.
At the end of each row, you can press down the yarn you’ve just woven through the strings (called beating the weft), or you can leave the fabric less dense and let the warp show. With a child, I like to create one piece by the simplest method then add a new technique for the next piece. I recommend starting with a looser woven piece. This is also much quicker to make, and an easy win can be motivation to put in more time for the next piece.
When your child is finished weaving on the basic loom, the piece should hold together when you take it off the pegs. You may need to push the weft around a bit to even out the rows.
How Many Doll Blankets Do You Need?
If your child comes to enjoy weaving, you may end up with a lot of doll blankets, purses, and coasters. As my children started producing more and more little pieces of work, I steered them toward using those small pieces to produce bigger pieces.
Make a Pillow. If your child weaves six pieces on the small wooden loom, each approximately 6.5″ x 10″ (depending on how tight they pull as they are weaving), you can sew those together to create one 20″ x 20″ piece, which is perfect for a throw pillow. If you either sew that piece to the front of an existing pillow or make a new pillow with some sturdy fabric on the back then fill it with a 20″ x 20″ pillow form, you have a beautiful object that you can use around the house. You give your child the experience of creating a complete object. What a great gift that would be for grandma. My family still uses pillows made by my children years ago. I love that constant reminder.
Make a Blanket. If your child loves weaving even after you have plenty of pillows, move on to making blankets. My daughter kept making new projects until she found her level at the size of baby blankets. Just be open to using all of the little pieces of weaving in a bigger project of some kind.
Very Basic Weaving. Did you weave potholders as a child? I did. I learned weaving with cotton loops on a square potholder loom. The difference between the wooden peg loom and the potholder loom is in the weft. For potholders, single loops are the weft for each separate row; for the small tapestry loom, one continuous piece of yarn is your weft row after row. We carry the traditional potholder loom and extra cotton weaving loops because we think your child might enjoy basic weaving as a confidence-building experience.
More Advanced Weaving. If you have kids who like to experiment, and who doesn’t, increase the challenge as they learn weaving.
- Weave with thread. Try doing the same kind of piece on a tiny loom.
- Build a giant loom. See how big you can go. Weave a whole blanket all at once rather than creating a patchwork of smaller pieces.
- Draw with yarn. Learn how to use the weft and the warp to create geometric shapes then organic shapes then images.
- Learn about weaving. This would be a great opportunity to look at weaving in a museum or gallery. Read storybooks about weaving. I love Elsa Beskow’s Pelle’s New Suit, in which a young shepherd uses his lamb’s wool to have a new suit made, and Charles Blood’s The Goat in the Rug, which tells the story of Navajo weaving from a goat’s point of view. Both books tell stories that engage a child in process from animal through to the final product.
The more your child connects what they are learning with the world around them, the better. Weaving holds a world of such potential expression, whether they weave a story in tapestry or just make a potholder.
